Saturday, January 31, 2009

12x12 Custom page is DONE!!!

hi Everyone,

this is a quick post to show you the result of that custom order I had for a 12x12 scrapbook page. Be sure to click on the photos to enlarge them and see the details. :)

This is the original layout.


My customer asked me to duplicate it. Unfortunately that is just not possible for me. But I came pretty close. I painted and transformed the chipboard scrolls I had at home, and I also distressed the eyelet brads I had. Click on the colored links to learn how you can do the same.

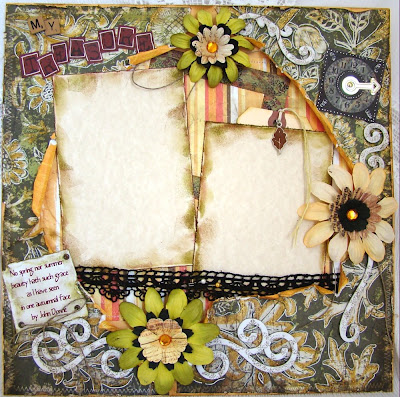
Here is the result of the layout. After I painted the scrolls I stamped on them to complete the look I was going for. Would love to hear your comments!! thanks :)


Friday, January 30, 2009

Distressing and inking eyelets and brads!!

I am working on a new layout. Click HERE to read the post I talk about it.

So, I needed some dark distressed eyelet brad. All I had was bright colored ones. so, I used a nail filer and sanded the one I had. You will see in the photo, it is a blue one. Then I inked it with Distressed walnut ink.

In the photo, the first brad on the left is the original color, then sanded and the last one, sanded and inked. Come back to see how I used it on the layout!!


Also this is an eyelet that has a backing of a brad, so you don't need to set it. All you have to do is punch a hole and put the eyelet brad in the hole and fold the little legs behind the paper like you would a brad.

I want to make a little confession here: I have never set an eyelet. LOL

So next time you need some metal embellishments and all you have are COLOREd ones sand them. Use a nail file or sand paper, whatever you got on hands!!

Enjoy! Would love to hear your comments if any of my tips are helping you out at all!! :) Thanks.

tereza

Coloring and using the Chipboard at hand!!

I am at the moment working on a custom 12x12 page. The customer saw a page I made in the past and asked me to duplicate it. I kindly explained to her that I would be glad to make another one for her, but it would NOT be exactly the same as the first.

I have a very hard time duplicating any of my work because most of it comes out of pure inspiration of the moment. So while, I can use some of the same papers and products and maybe keep with the same sketch, the layout will have a very different feel from the first because that is just how it is with a creative spirit.

I will post the finished layout later with the original for you to see what I mean.

Now, the hurdle I found with this layout is that I used some chipboard scrolls that were white and I don't have any more of those. So, using my thinker, I decided to paint the scrolls I had. They were in a variety of colors and I painted them all white, as you can see on the photo.


Some of the scrolls were flocked and had bright colors so I had to use a second coat of acrylic paint. Once it dried all I did was punch them out of their sheet. They came already with adhesive in the back. I did not worry about the chipboard being perfectly painted since it will be stamped. I will show you the results next week.

So, next time you need a chipboard letter or any other embellishment in a color you don't have, just paint it. :)

Enjoy!!

Tereza

Wednesday, January 28, 2009

and the Winner is...

Hi everyone, I am sorry I kind of fell off the face of the Earth, but I am still here. :)

the winner of my first give away is VITTORY. I will be sending you 4 chipboard puzzle pieces ready for you to create an album. Please email me at mytreasuredcreations@gmail.com with your address and name so I can ship the pieces to you. You have until February 05, 2008 to contact to claim your prize. If I don't hear from you I will draw another name. Thanks to everyone who participated.

Please check back I will be posting more tips this coming weekend.

Tereza

Wednesday, January 14, 2009

My first Blog Candy: Chipboard Puzzle Pieces

This is my first blog candy in my new blog. :)

I have seen a lot of people looking for these so I decided to offer them to you: 4 chipboard puzzle pieces. They measure 8x9" and come painted with black acrylic paint. They are all the same, but if you overlap them in different directions they end up looking like each piece is unique. Check out all the photos to see the details. The card on top of one of the pieces measures 4.25x5.5".


They come without holes or book rings so that way you can use them any way you like. When punching the holes make sure you line up the pieces so that your holes are on top of each other.

Each piece was hand cut and hand painted by me. I made sure that the edges were sanded and are smooth, but I am human so I can't promise perfection.

So what you have to do to get these? Leave me a comment on this blog, add a link of this blog candy on YOUR blog (if you have one) and EITHER follow the blog or sign up for my newsletter. It's important that you leave me an email so I can contact you. IF you sign up for my newsletter I will have your email address, or if you link me to your blog I will have a way to contact you. :) That easy!!

If you are in a hurry to get these, you can find them in my Etsy SHOP.

Look HERE to see the album I did with these same pieces.

I will draw a winner on January 24th, 2009 at midnight CT.

Thank you for participating and have fun!! :)

Tereza

Tuesday, January 13, 2009

Working with Doily

If you are a fan of everything romantic you have seen the doilies that have taken over the scrapbooking world. Now you can find them in many different sizes, color and shapes. There are many different companies that are making them.

I wanted to use the doily in my scrapbook layouts without having to spend an enormous amount of money. Let me explain: I live in a very rural area, I have no Local Scrapbook store and the closest Craft Hobby Store is an hour away. Although I purchase most of my supplies online, it still needs to make sense financially. So I try to keep a list of things I need and purchase them all at the same time from the same place so I save on shipping.

So on this day, I decided to work with what I had on hand. I purchased some 12" doilies from Walmart. (yes, we do have one in my town! LOL) My children and I painted our doilies. After I painted mine with acrylic paint, I dabbed a piece of cloth on it, to give it a shabby look, taking some of the paint off.


Now, you say: "But it's not Acid Free." No, it's probably not. But if you painted it with acrylic paint you have put a barrier between the acid from the doily and your photos. "But you took some of the paint off!" Right. So you mat your photos.

A lot of the fear of the acid on the papers that are not made for scrapbooking has no precedence since you can always protect your photos by matting them with Acid Free paper or card stock. Make sure that papers or items that are NOT acid free are NOT touching your photos, or you can always buy one of those spray things that supposedly neutralizes the acid of the paper. :( Right, one more thing to buy!!

Anyway, here is the final layout that I used the doily on! Also take a look at one of the cards I have made in the past using doilies. Enjoy and feel free to leave me a comment or a question!

Tereza


Sunday, January 11, 2009

Getting rid of Blood Stains

I know that Blood stains has very little to do with scrapbooking, but there is a verse in the Bible that says "My people perish for lack of knowledge". How many times have you wished you just knew that one piece of information that could have saved your day??

So the other day, my husband was running late getting ready for work and I heard him in the bathroom having a hard time. He cut himself while shaving and the cut would not stop bleeding. He got more and more aggravated as his brand new shirt got stained with blood and he kept putting pressure on the cut trying to make the bleeding stop. He got his second shirt stained again with blood and was rapidly losing his patience.

Finally I told him to lay down on the bed and calm down. He finally did, the bleeding somewhat stopped and we were able to put a band-aid on his chin. So I made him change his shirt again. All the while he kept complaining that I was going to have to wash all those blood stained shirts. I told him not to worry about them, I wasn't going to throw them in the washing machine. A little cold water and scrubbing in the bathroom sink and they would be squeaky clean again.

He left for work and a couple of hours later after I had fed the children and somewhat organized the house I went back to the bathroom.

Now, this is where you need to store this piece of information in your hard drive (your head) and next time you are faced with this problem you will know what to do.

The best way to get rid of blood stains is to get the area wet with COLD water. Not hot or warm water, COLD water otherwise the stain will set. After the area is wet, scrub the stain. With your hands formed into fists as you grab the cloth, scrub it against itself, like our ancestors used to do when there was no washing machines. Scrub, rinse with cold water, scrub again, rinse. It should take you a couple of minutes and the stain will disappear. No need for laundry detergent, or any other chemical, or soaking to get rid of the stain.

I squeezed the wet area and hung the shirts back in the closet to dry. After they were completely dry there was no sign of the blood stain, or yellowing of any kind. :)

Now, it's important that you don't let the stain set on the fabric. You can probably wait a couple of hours to scrub the stain off, but don't soak your blood stained garments in water in the bathroom sink all day. Take a couple of minutes and get rid of it right away!! I heard this technique will work with wine and other foods that will stain fabric. So make sure to try it out!! :)

I hope that piece of information saves your day some day!!! :)

Tereza
Friday, January 9, 2009

Got Flowers? What to do when you need Prima flowers.

Would you love to be able to buy any Prima flower you wanted and as many as your heart desired? I would!! Unfortunately, it's just not possible. LOL

So I have learned to improvise and work with what I got. Last year when I was working on a new project I did not have Prima flowers in the right color for it. So I began brainstorming how could I get it without having to buy any more supplies. I am drowning in supplies!! LOL (Answer this question: do you have NEW, UNTOUCHED, CLOSED, UNOPENED containers or boxes of Prima flowers? If you answered "yes", then you are drowning in supplies too!)

I learned with Scrapperlicious how to make flowers out of pattern paper, vellum, acrylic and more! But that was not the look I was going for. I wanted to use some Prima flowers! So it hit me: I can paint them!!!

Yes, I can paint them! So I used some acrylic paint and painted my pretty Prima flowers.


The ones on the left are the original. The ones on the right are the result of my painting job. :)

I needed some flowers that were of a deeper green, like grass green; and I needed some red flowers. So now, I had them! So next time you can't find an exact color in your Flower stash, paint what you got!!

Here is a photo of the painted flowers on my project.


I will be talking about some basic supplies that you should always have on hand on later posts. Be sure to sign up for my newsletter or follow the blog. In a day, where everyone talks about how bad the economy is (I don't agree with the rumor) you surely would appreciate to learn how you can keep your cardmaking/ scrapbooking hobby going, wouldn't you?

Let me know you stopped by and say hi!! :) Also, check out my other blog for some of my projects.

Tereza